Intro to Custom Clicks via CSV Upload
When you want to record a Custom Click into a Contact's customer journey, there are a few possibilities to accomplish this: CSV, HTTP Post, Zapier, or API. This article focuses on uploading Custom Clicks via CSV Upload.
Here are some examples of when you would want to upload a custom click:
- Scenario #1 - Attributing Historical Leads
Case: You have several leads that you personally tracked prior to joining Wicked Reports, yet Wicked was unable to track these due to our tracking script not yet being set up. By default, Wicked will attribute these leads as "UnAttributed" new leads. However, if you know the source that originally generated these leads, then you can pass through Custom "NEW_LEAD" Clicks.
- Scenario #2 - Attributing Orders
Case: You have several orders that have gone unattributed for some reason. However, you know which clicks drove the sale of those orders. In this case, by adding the Custom "LAST_CLICK" attribution, you could attribute those orders to their appropriate sources.
- Scenario #3 - Attributing Leads from a Live Event
Case: You go to an in-person marketing event and collect a list of leads. Afterward, you import these leads into your CRM. After importing these leads to your CRM, you notice that some of these leads were already in your CRM. In this case, Wicked could not attribute any of these leads since the event was offline. So, by adding a Custom "Live_Event" Click, you could attribute your list of leads to the marketing event. The Conversion Type "Live_Event" will then automatically set your click with the correct "New Lead" or "Re-Opt-In" attribution.
- Scenario #4 - Automatically Attribute Clicks
Case: You have several clicks that you know should be attributed, but you're not sure how they should be attributed. In this case, you could set the Type to ATTRIBUTED, and Wicked will attribute this correctly on your behalf.
You can also learn more about custom clicks in this help doc. Now, let's take a look at how to format your Custom Clicks for CSV Upload.
How to Format your Custom Clicks for CSV upload
When preparing your Custom Clicks for CSV upload, you'll want to make sure you've added all the required fields and formatted them correctly. If you have not prepared your file properly, you will receive an error message and you'll need to correct it before the file can process. In this section, we'll cover:
Please take a moment to read through this section so that you are aware of exactly how to prepare your file.
CSV Template:
Here is the CSV template, which you can use to enter your custom clicks and then upload via the "clicks" uploader tool: [CLICK HERE TO DOWNLOAD TEMPLATE]
CSV Format Requirements:
-
The header row is case-sensitive and must match the CSV Template provided above.
-
For text format, please use UTF-8 encoding for your CSV file.
Here are the required fields:
- EMAIL: Email of the lead for the click.
- CLICK TIME: This is a Date/Time setting to create the click against. You can use “NOW” for the current date/time or another date/time using this format: MM/DD/YYYY HH:MM (in 24-hour format)
- If 12-hour format, you must include AM/PM, and the correct date format would be: MM/DD/YYYY HH:MM AM/PM
- An example of a correctly formatted CLICK TIME field would be: "NOW" for the current date/time, "09/29/2016 20:15" if 24-hour, or "09/29/2016 08:15 PM" if 12-hour.
- TIMEZONE: Timezone of Date/Time provided. This would be the timezone your CRM is using, NOT the Timezone of the Contact.
- Examples: EST Timezone="UTC-5”, CST Timezone="UTC-6, MST Timezone=“UTC-7”
- Infusionsoft uses EST (UTC-5)
- If you are using a PresetOveride EXISTING_LEADS or ORDER_LAST_CLICK, you can use "UTC-0"
- Timezones change with Daylight Savings Time. For example, EST (Eastern Standard Time) is UTC-5 part of the year and UTC-4 part of the year. If you are setting up an automation that will run continuously, you will need to be aware of this and make sure your automation updates when Daylight Savings Time occurs.
- SOURCE: The utm_source value that will be applied to the click.
Not required, but highly recommended. - CAMPAIGN: The utm_campaign value that will be applied to the click
Not required, but highly recommended. - CONVERSION TYPE: The type of conversion being sent to Wicked.
The valid options are:- ATTRIBUTED_CLICK
This Conversion Type would be used if you want to track a click but you aren’t sure how it should be attributed and you want Wicked to decide the attribution for you.
- ATTRIBUTED_CLICK
-
- NEW_LEAD
This Conversion Type would be used if you have historical leads, know where they came from, and want to ensure they receive First Optin attribution. NOTE: When using this Conversion Type, the Date_Time value will be ignored. And, instead, the contact creation time will automatically be used. - REOPTIN
This Conversion Type would be used if you want to track a ReOptin. - LAST_CLICK
This Conversion Type would be used if you want to track the last click that happened immediately prior to the contact's purchase. NOTE: The Order ID is required when using using this Conversion Type. - LIVE_EVENT
This Conversion Type would be used if you were collecting leads at an event and want to create an opt-in for each of the leads you acquired there.
- If the click is EARLIER than the create date of the contact in Wicked Reports, we will use the UTMs provided to set the First Optin Attribution for the contact.
- If the click is LATER than the create date of the contact in Wicked Reports, we will use the UTMs provided to create a Re-Optin for the contact.
- NEW_LEAD
Here are the optional fields:
- IP ADDRESS: The IP address of the user.
Recommended, if available. - TIME OFFSET: The number of minutes to subtract from CLICK TIME.
- Example: If you know there is a 20-minute delay between when the click is created and when you want it to appear delayed, use 20 as your TIME OFFSET.
- TERM: The utm_term value that will be applied to the click.
Recommended, if available. - MEDIUM: The utm_medium value that will be applied to the click.
Recommended, if available. - CONTENT: The utm_content value that will be applied to the click.
Recommended, if available - WickedId: If you know the Wicked ID of the click, you can use it here. If you have a value for WickedID, you must have a value for WickedSource
- WickedSource: If you know the Wicked Source of the click, you can use it here. If you have a value for WickedSource, you must have a value for WickedId.
- OrderID: The Order ID you would like to use to tie the last click.
Required if using the "LAST_CLICK" ConversionType. Optional in all other cases.
Now that you've added all the required fields and formatted them correctly, you can go ahead and send your custom click to Wicked!
How to upload Custom Clicks via CSV
In this section, you'll learn how to upload your custom clicks into Wicked via CSV. Additionally, you'll learn some additional information related to the CSV uploader tool. Let's begin.
- Login to your Wicked Reports Account
- In your left navigation bar, go to the API & Uploaders Page
- Select the "Clicks Uploader" page
- When you open the page, you will see two tabs
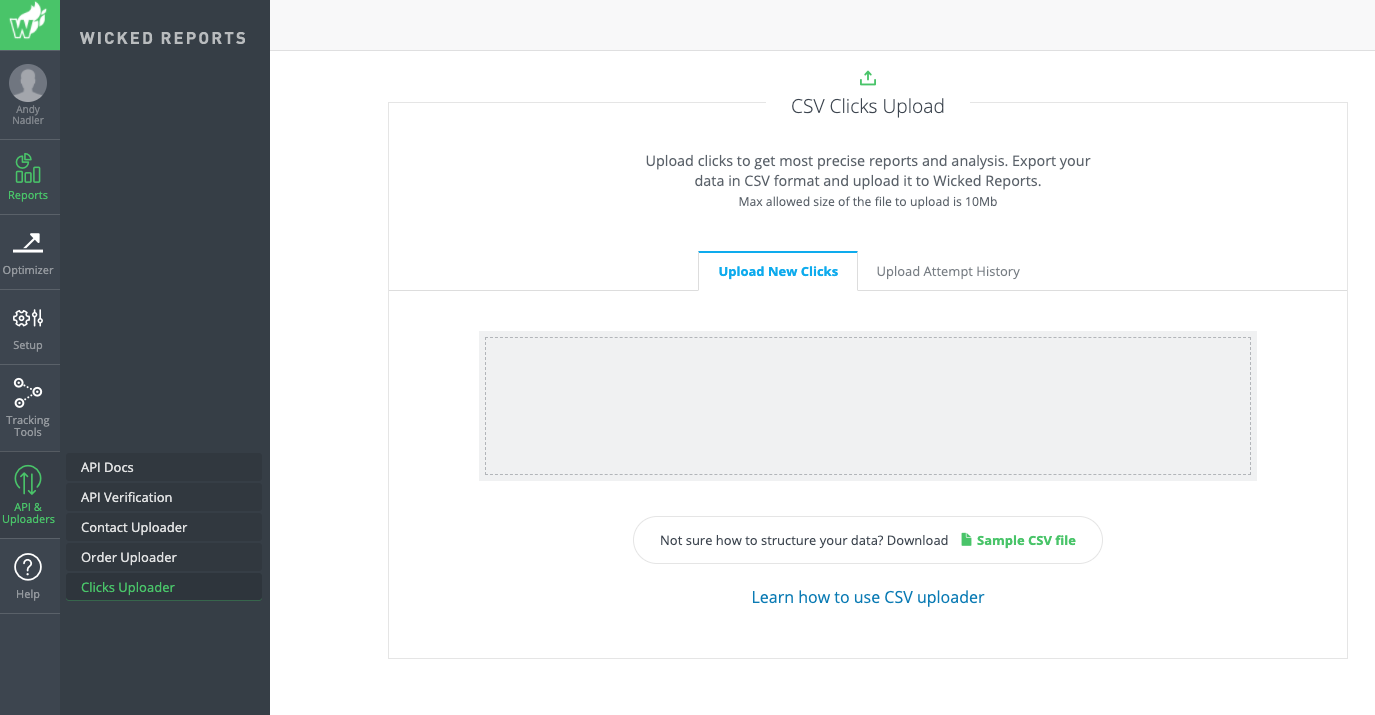
- Upload New Clicks: You can drag and drop (or select) the .csv order file you want to upload. This uploader works for custom clicks and custom conversions.
- Upload Attempt History: You can see all the upload attempts you've made (successful and failed)
- On the Upload New Clicks tab, you will see a drop area where you can drop a .csv file (or click and select the file). Once dropped (or selected), Wicked Reports will attempt to validate all the custom clicks in the file.
- If NO errors are found, you will see all the custom clicks that were uploaded.
- If any errors are found, you will receive a message with the count of custom clicks that have errors.
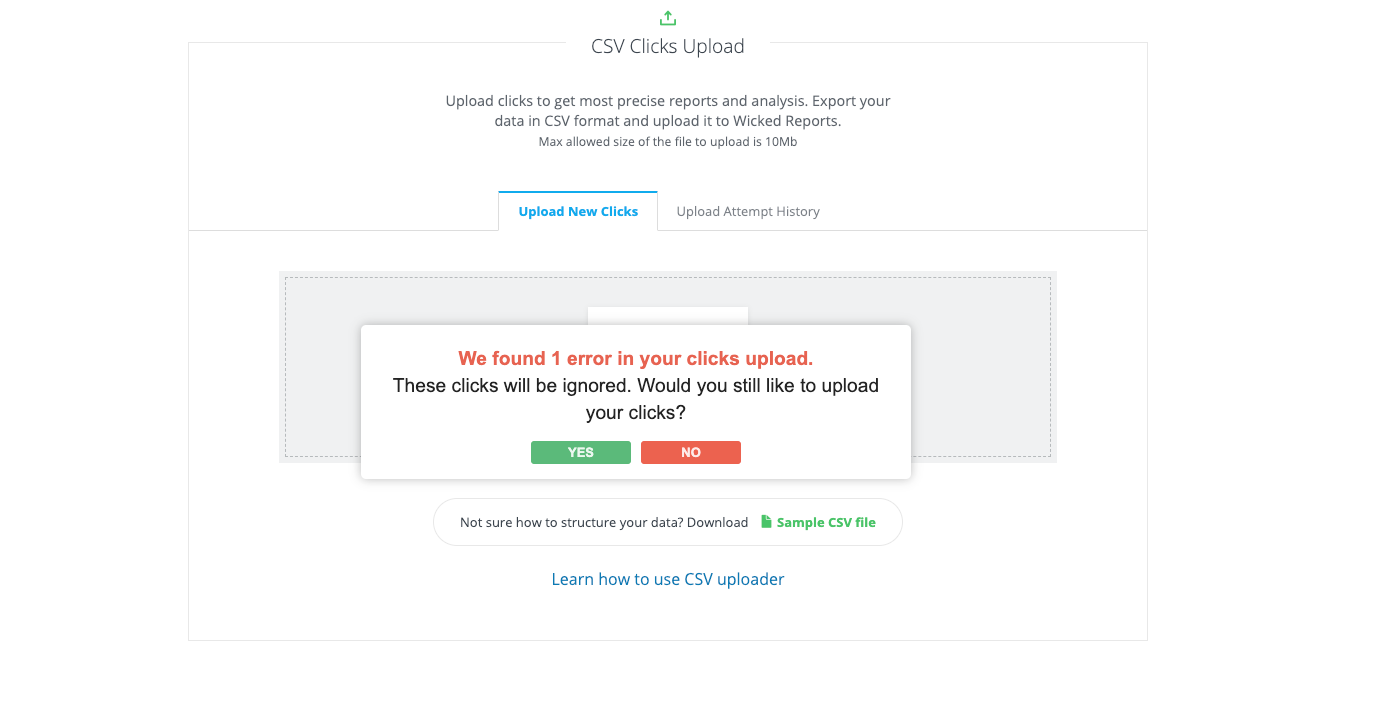
- If you select "Yes", you will be shown the custom clicks to see which ones had errors. You will then be able to "Submit" the good custom clicks and ignore the bad ones.
- If you select "No", you will be taken back to the previous screen where you can select the file to re-upload after the proper edits have been made.
That's it! You've now completed your custom clicks upload. If you'd like to learn more about your custom clicks, such as how to see if your custom clicks have been processed, and where to view your custom clicks in Wicked Reports, then visit the Custom Clicks article for all that and more!
If you have any questions regarding custom clicks, then please review the FAQs below. If you find you still have questions after reading the FAQs, then reach out to the Wicked Reports support team via live chat, or by sending an email directly to support@wickedreports.com. We're always happy to help!
FAQs
- How do I view the clicks that I have already uploaded?
To see all of your CSV uploads, you can click on the tab "Upload Attempt History".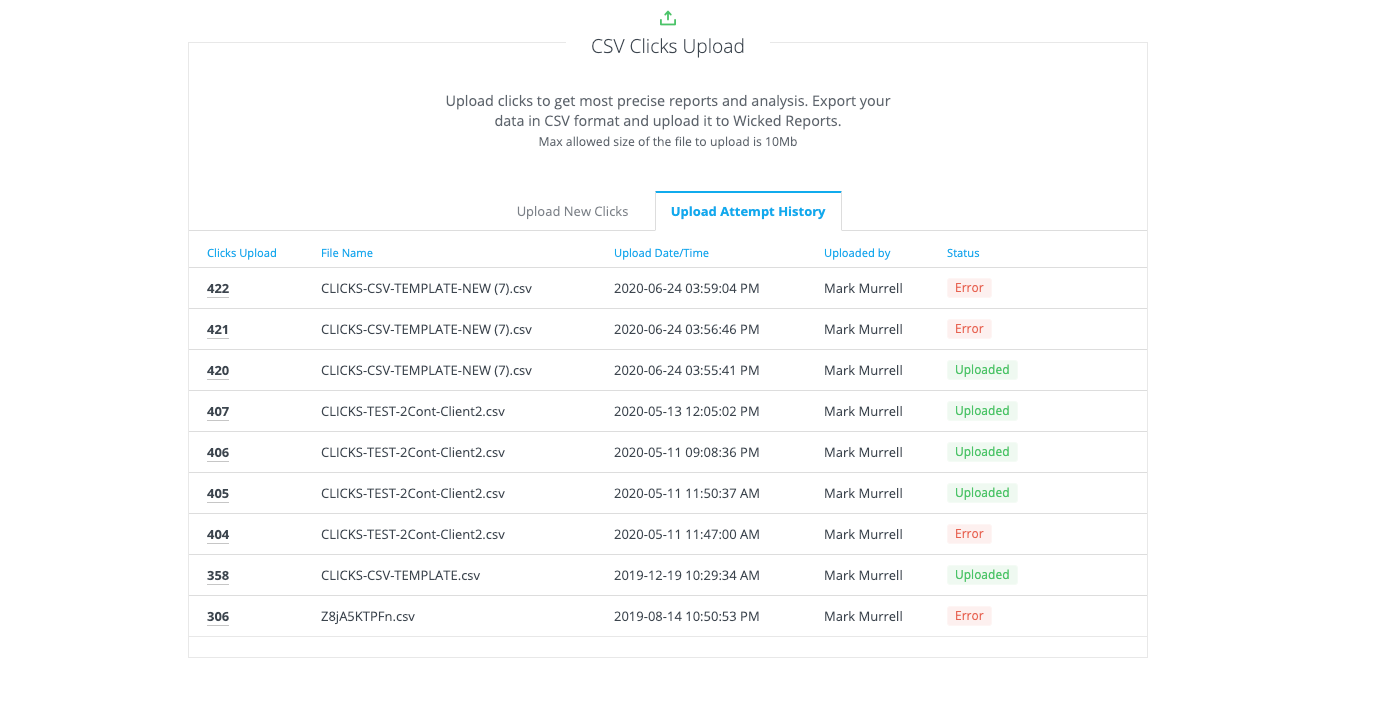
- Is there a limitation on the number of clicks I can upload?
Yes, the limit is 10k rows of data per upload.